
5th Color Setup
Get the most out of metallic media - reproduce the look of metallic inks by masking elements with White toner.
This tutorial will explain and demonstrate how to print a White spot color on metallic media, creating a mask for the metallic media to show through, enhancing the CMYK layer.
In this example, a swatch and layer will be created in InDesign which, when outputted, will simulate metallic properties in specific areas on the final output.
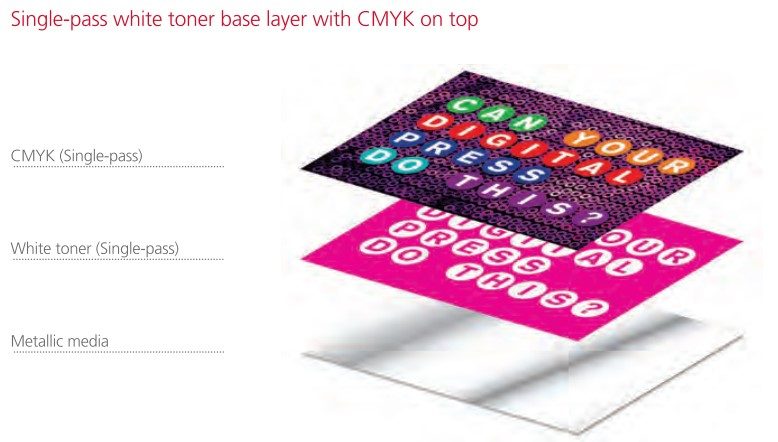
With the RICOH Pro C7200X series, this is a now a Single-pass process, where the 5 Color layer can be printed in-line with the CMYK. The areas that do not have a 5 Color base layer will yield a metallic ink effect. One PDF will be created and printed.
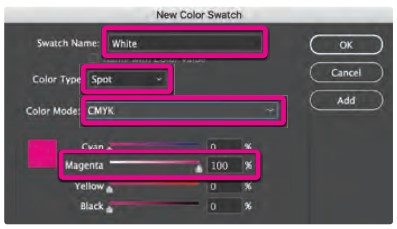
1. Open the layout you are looking to enhance with White toner. In this example we are using InDesign. Create a New Swatch by clicking the top right corner of the swatch palette and select New Color Swatch.
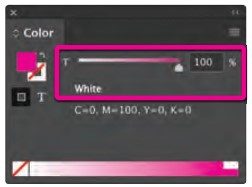
- Name the swatch White.
- Select Spot Color for Color Type.
- Select CMYK for Color Mode.
- It is recommended to choose 100% Magenta, to represent White toner

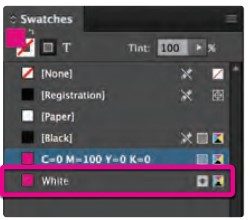
2. The Magenta spot color will represent the White toner.
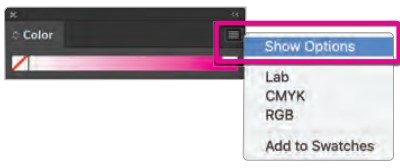
3. The amount of toner density can be adjusted in the color panel on the Density Scale.
- From the Menu bar select Window then Color to display the Color Panel. If the Density Scale is not displayed, select Show Options.
- Drag the Density Scale or enter the percentage in the box to adjust the density.
4. Create an Artwork layer and a 5th Color layer in the document. The 5th Color White toner layer will become the Base layer. The Artwork will be the CMYK layer.
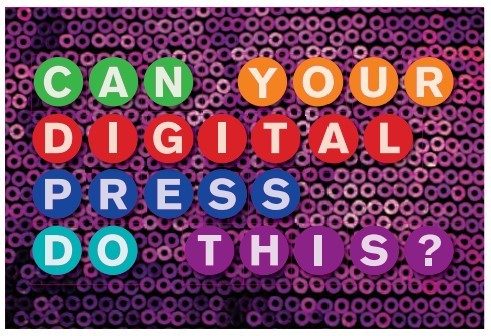
The Magenta/White layer in this example covers the majority of the layout allowing only small portions of the metallic media to
show through. Background will appear unaffected, and prints over the White base layer.
Background image Opacity is set to Multiply, since Overprint Fill is not an option, to allow the White toner Base Layer to print,
regardless of artwork overtop of it.
Any White areas in the Artwork layer will not print, creating a metallic effect.
Type masks the media and the dots take on a metallic effect
Background will appear unaffected, and prints over the White base layer.
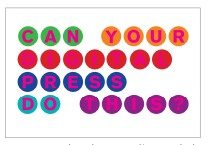
Actual coverage of White toneron metallic media.
5a. Set the Blending Mode of the background image to Multiply since it is positioned over the White toner layer. If it's not set to Multiply
then the White layer information underneath will not be present when the PDF is exported.
Note: Images cannot utilize the Overprint Fill feature, which is an output effect, only for vector art and type. Images must use Multiply to ensure any artwork underneath will print properly.
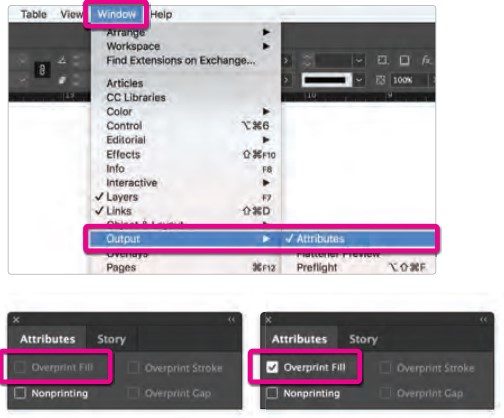
5b. Overprint Fill can be used in place of Multiply for vector or type elements only. If that were the case, you would:
- Select Window.
- Scroll down to Output.
- Select Attributes.
- With the Attributes panel open and the top-most object selected, check Overprint Fill. This will blend the object on top with whatever objects are underneath it. The results will not be immediately visible, as Overprint Fill is an output effect.
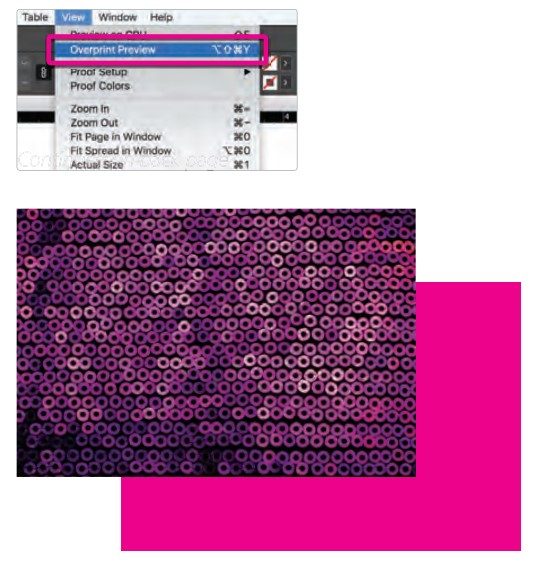
6. To confirm the artwork has been formatted correctly when using Overprint Fill, use Overprint Preview under the View menu to simulate the effect, otherwise the object will appear unchanged. The artwork will appear more Magenta if formatted correctly, as InDesign is simulating the printing of White (Magenta in this case) beneath the background artwork.
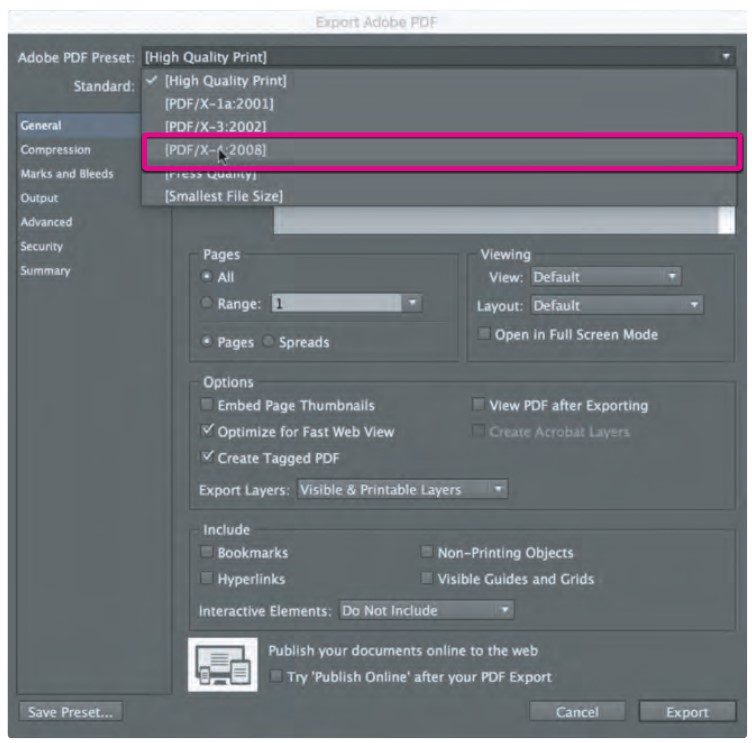
7. With your elements formatted and blending modes properly set, you are ready to create a Export your file as a PDF. File – Export, using the PDF Preset PDF/X–4:2008. This will allow Fiery® Command WorkStation to recognize where to apply the 5th Color White Toner.
8. With your PDF exported, it's a good idea to open up the file using Adobe Acrobat to confirm not only the presence of the White toner, but also that it is blending properly.
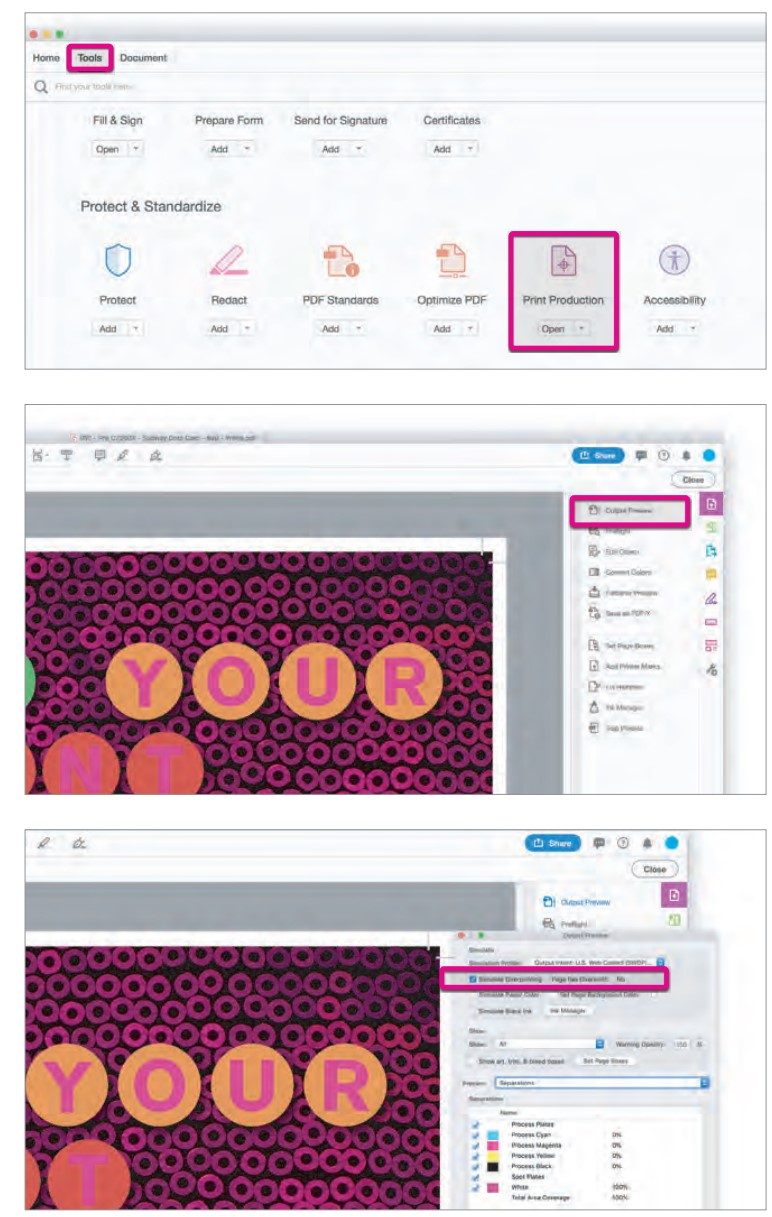
- Open the PDF using Acrobat.
- Navigate to the Tools menu and select Print Production.
- Select Output Preview
- Confirm Simulate Overprinting is checked.
9. Locate the Spot Colors in the Separations window.
- Confirm the presence of White Spot Color by mousing over the artwork.
- The percentage will be displayed in the Separations window.
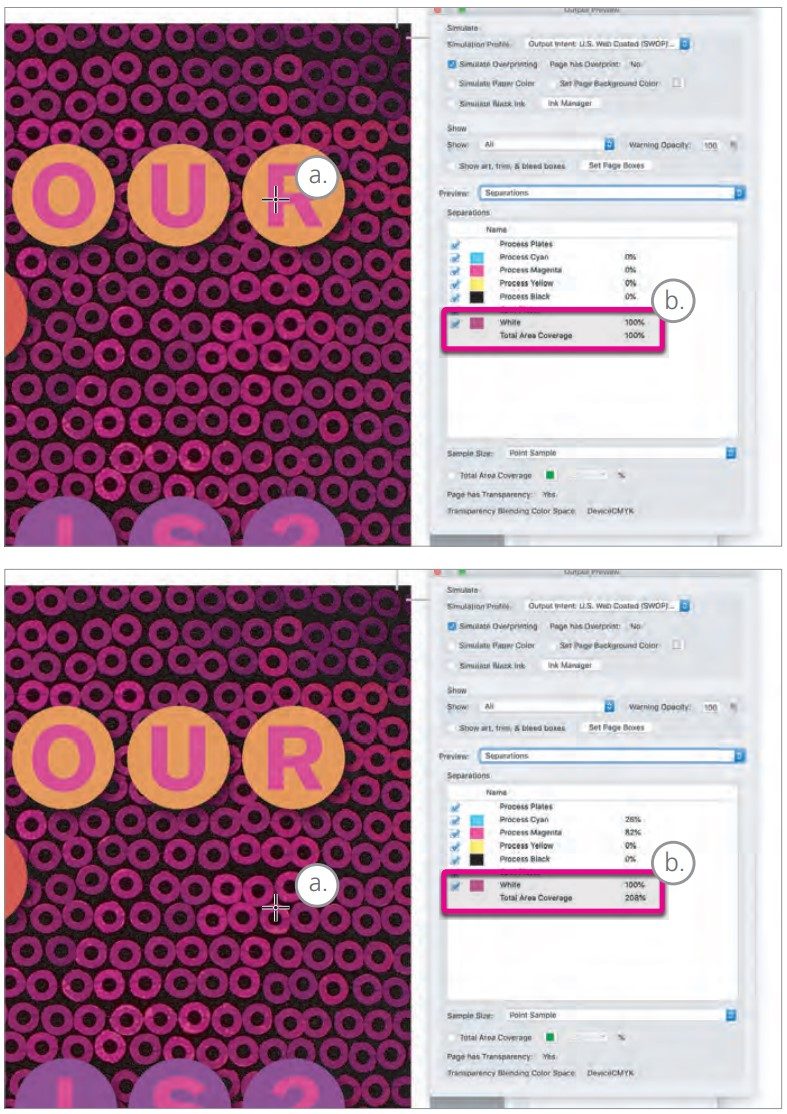
(The background color with show through the Multiplied background image.)
10. With the presence of the 5th Color confirmed and the blending mode properly formatted, you're ready to print your file.